
Most people open a book nook kit, see a couple hundred laser-cut wooden pieces and a coil of wire, and start gluing whatever looks like it belongs together. Two hours later the walls are crooked, the LED strip is trapped behind a bookcase that will not come back out, and the whole thing is back in the box.
A DIY book nook kit is not a hard build. It is a sequenced build. The panels are cut to fit, the wiring is planned for you, and the instructions are a script rather than a suggestion. What sinks these projects is order, not talent.
I have spent fifteen years building model kits of every material, and the rule transfers cleanly from styrene to plywood: dry-fit first, finish flat, wire last, and never glue two pieces you have not already tested together.
Why you should trust me
I built my first model kit at eleven and never stopped. Fifteen years of Gunpla, ten of those with an airbrush, plus a backlog that will outlive me. I have judged local Gunpla competitions twice, which is where I learned to score engineering instead of taste.
Miniature kits are the other half of my bench. A laser-cut book nook lives or dies on the same things a plastic kit does: slot tolerance, tab placement, and whether the printed details line up once the walls are square. I run every kit through four questions before I recommend it. Does it go together without force? Are the connection points hidden once the scene is lit? Are the printed pieces usable? And would I build it again for fun?
How I picked and how I tested
I kept this guide to two kits in the same format and the same band, both wooden miniature builds with printed paper details and an LED element, so the comparison is apples to apples instead of a shopping list.
The scorecard has four lines. Part fit is how much sanding a tab needs before it seats, and whether the slots hold on their own without clamps. Connection honesty is whether the tabs and screw points land on faces you will actually see once the scene is lit. Print quality is whether the cardstock and paper details survive cutting and gluing without fuzzing at the edges. Repeat value is whether the build teaches you something or just eats a weekend.
I did not count pieces and I did not chase aftermarket upgrades. No brass wire, no custom paint, no replacement LEDs. A kit should be judged on what is in the box, because that is what you are buying.
The one thing that matters most with these builds is slot depth. A laser cutter burns a kerf slightly wider than the drawing calls for, and if the manufacturer does not account for it, every tab in the kit is loose and you end up holding joints by hand while the glue sets. That is the failure mode to watch for, and it is the first thing I check when I open a sheet.
The two kits worth your bench time
Both kits below are the same species of project: laser-cut wooden parts, printed paper details, and a light source that has to be routed before the shell closes. The difference is how much they ask of you.
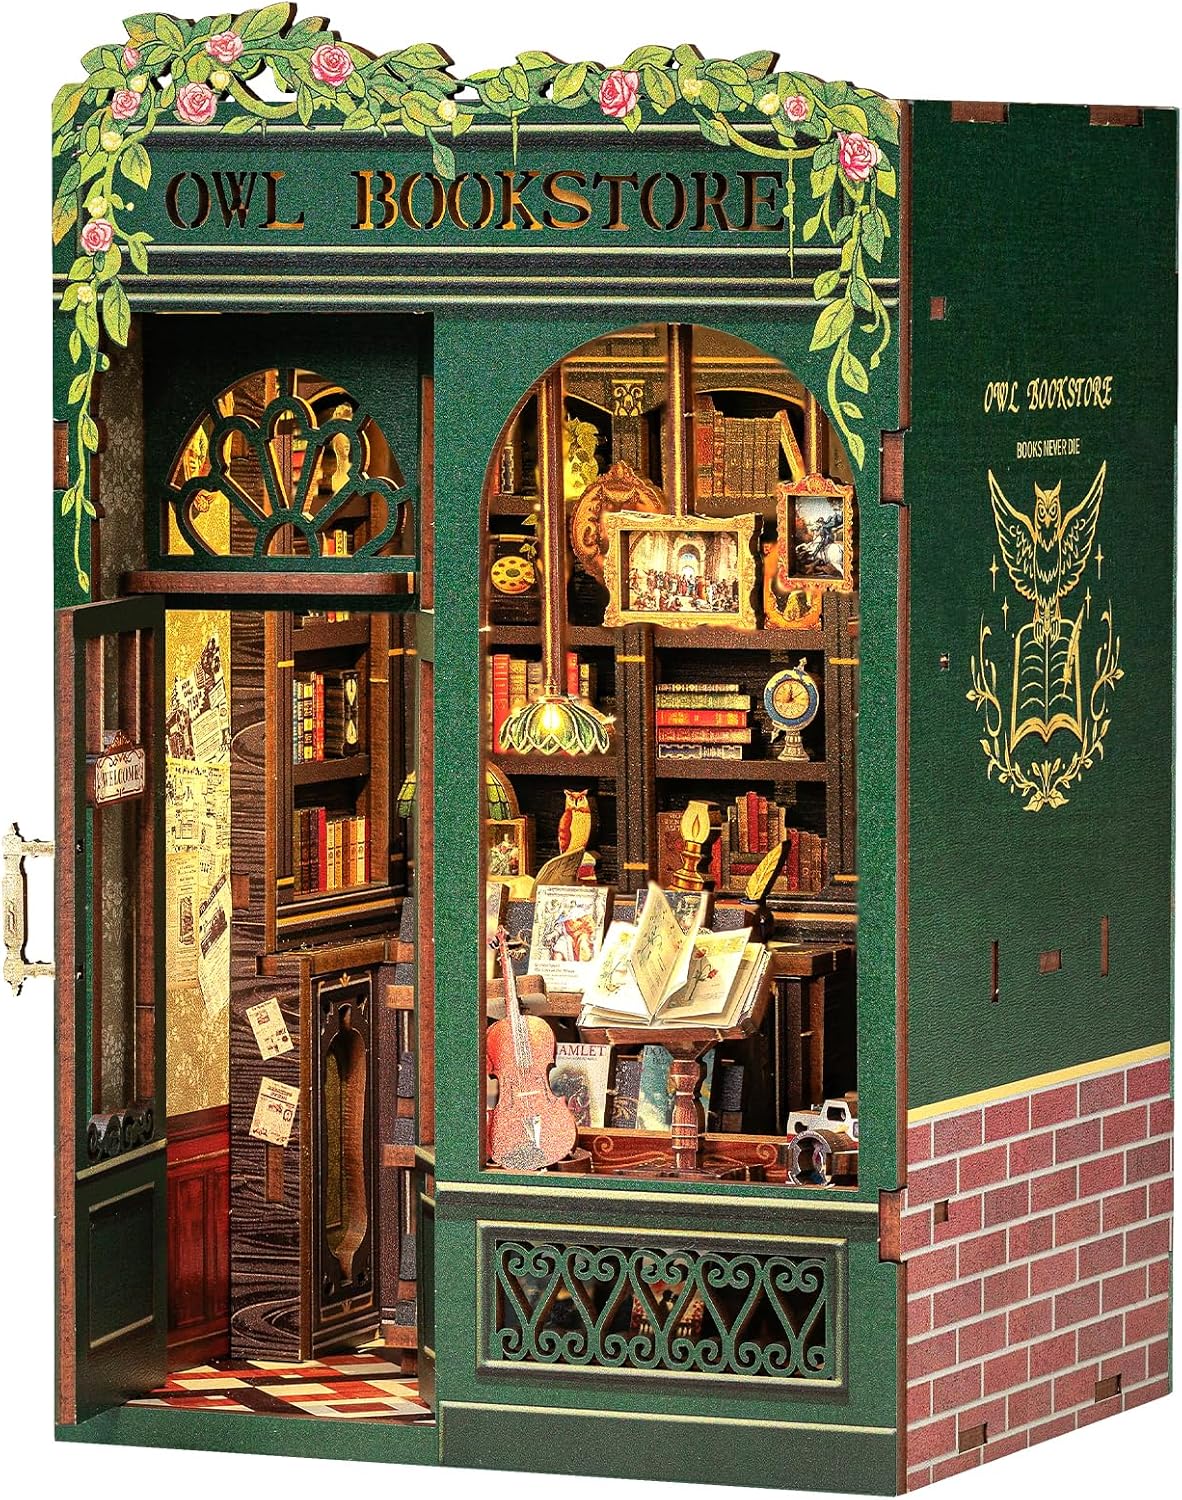
Best for a first build: CUTEBEE Book Nook Kit - DIY Miniature House Kit for Adults, Teens and Beginners, Dollhouse Booknook Library Tiny House Bookshelf Decor 3D Wooden Puzzle, Gifts for Family, Friends (Owl Bookstore)
 Visit on Amazon →
Start here if you have never built a laser-cut kit. This one is sold as a beginner-friendly wooden puzzle, and the Owl Bookstore scene is the easier of the two to read on a shelf: one clear focal wall, a warm interior, and a shape that sits flush against a row of books instead of leaning into it. Check current Amazon price.
What makes a kit like this beginner-friendly is not fewer parts. It is a step order that never asks you to guess. You build the shell, then the interior, then the light channel, then the front frame. If the instructions hold that order, you can work at a kitchen table with a craft knife and a bottle of wood glue.
The library theme helps more than it sounds like it would. A scene with one obvious centerpiece gives you a place to spend your patience, and the surrounding shelves forgive a slightly uneven joint.
Flaws but not dealbreakers: Kits in this class are glue-dependent by design. There is no snap-fit here, so budget drying time between sub-assemblies or you will knock a shelf loose reaching for the next piece.
Anyone buying a first miniature kit, or a gift for someone who likes books and small things, should look at this one first.
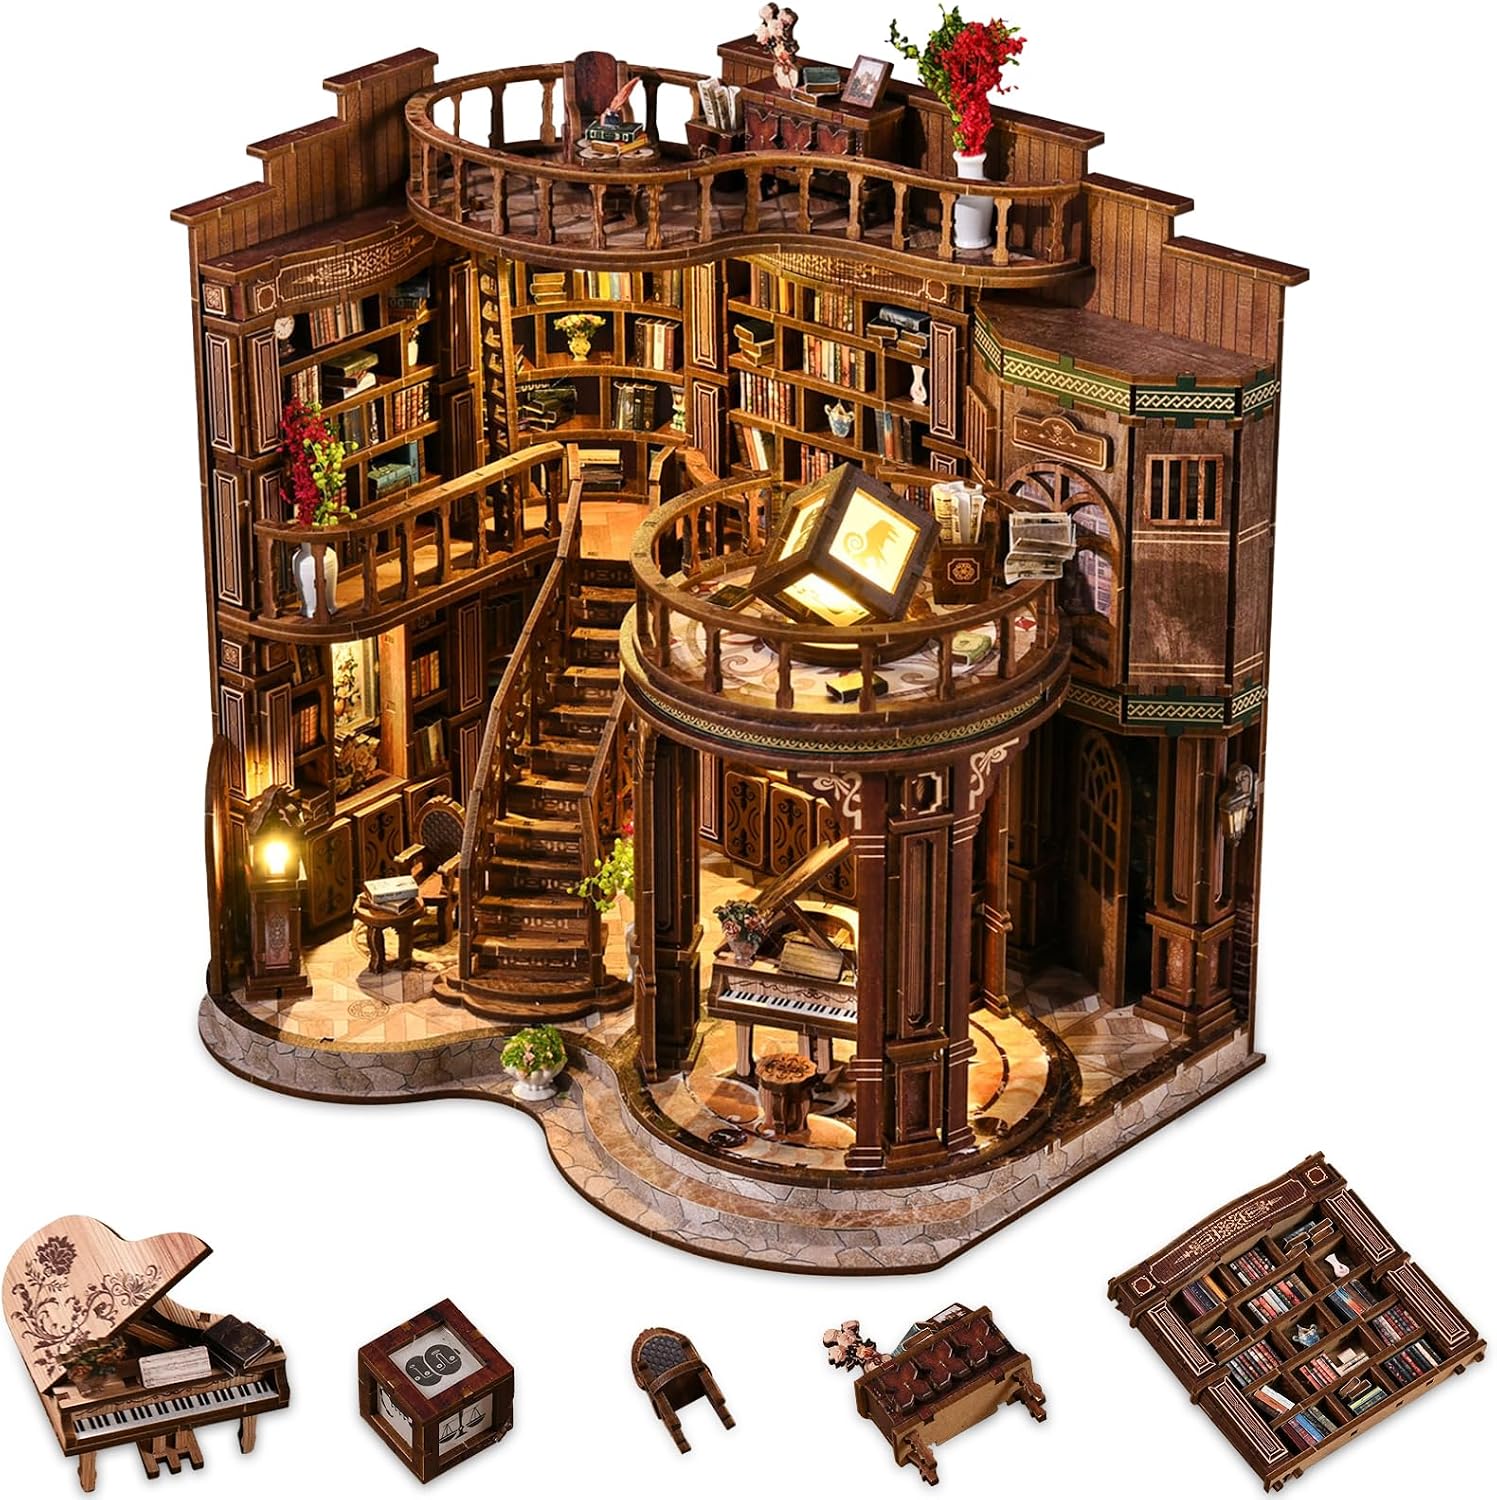
Best for a denser scene: Book Nooks for Adults, DIY Miniature Dollhouse BookNook Kit-Dream Booktore
 Visit on Amazon →
The Dream Bookstore kit is aimed squarely at adults and leans into detail. More small furniture, more printed signage, more surfaces that want a steady hand and a pair of tweezers. If you have already finished one of these and you want a scene with more going on when the light comes on, this is the step up. Check current Amazon price.
The tradeoff is time and patience. Denser scenes mean more glue joints and more chances to smear. Work in sub-assemblies, let each one cure, and keep the printed paper pieces on their sheet until the moment you need them, because a sign that has been sitting loose on a desk for three days has a way of vanishing under a cutting mat.
Flaws but not dealbreakers: The higher parts count means a longer build and more small pieces to lose. Sort every sheet into a tray before you start, not after you have already dropped something.
Anyone who has finished one book nook and wants the next one to have more to look at will get more out of this kit.
What is in the box and what you still need
Both kits ship with the same core contents: laser-cut wooden sheets, printed paper and cardstock details, a light strip with its power source, and illustrated instructions. Check the listing for whether glue and batteries are included, because that varies by kit and it is the difference between starting tonight and starting Thursday.
What you supply:
- A craft knife or flush cutters for freeing parts from the sheets
- A sanding stick or two in fine grits
- Wood glue with a fine applicator tip
- Tweezers for the small printed pieces
- A cutting mat and a shallow tray for loose parts
- Rubber bands or small clamps for curing joints
- Batteries if the kit's power source needs them
None of that is specialty gear. If you already build plastic models, you own most of it.
The actual build workflow
This is the order that keeps a book nook square. It works for either kit above.
Step one: inventory the sheets. Lay every sheet out and check it against the parts list before you cut anything. A missing piece found on day one is a customer service email. A missing piece found on hour six is a ruined evening.
Step two: read the whole instruction sheet once. Not the first page. The whole thing. You are looking for the step where the light goes in, because everything before that step is a chance to route the wire correctly.
Step three: dry-fit the shell. Assemble the outer walls and floor with no glue at all. If a joint will not seat with light finger pressure, the tab is the problem, not the slot.
Step four: sand the tabs, not the slots. This is the nub rule from plastic models and it holds here. Take material off the tab, test, repeat. Sanding a slot makes it loose forever.
Step five: build in sub-assemblies. Shell, furniture, front frame, light channel. Each one gets glued, squared against a flat surface, and left to cure. Rushing this step is how you end up with a floor that is a degree off and a front frame that will not close.
Step six: finish flat pieces before assembly. If you are staining or painting, do it while the parts are still on the sheet or in flat sections. Paint a slot and the tab will not fit. Mask the joints, finish, then build.
Step seven: wire the light before the shell closes. Test the strip with the power source while you can still reach every connection. Route the wire through the channel the kit provides, and leave the switch and battery box accessible from the outside. Burying the switch behind a glued wall is the single most common mistake in this hobby.
Step eight: close the shell and let it cure. Glue the frame, square it, and walk away. An hour of cure time beats an hour of re-gluing.
Step nine: the detail pass. Printed signs, tiny books, and the loose props go in last, after the structure is solid. This is the fun part, and it is more fun when the walls are not moving.
Step ten: place it. Slide it between books, turn the light on, and check the focal point from a normal reading distance, not from six inches away.
Where beginners go wrong
Every failed book nook I have seen failed at one of these points.
Gluing before dry-fitting. If you never test the joint dry, you are finding out about fit with wet glue in the way.
Sealing the light in. Route it, test it, and make sure you can change the battery without a chisel.
Over-gluing. Squeeze-out on a visible face is harder to fix than a slightly weak joint. Less glue, more patience.
Skipping cure time. Wood glue needs to set. Sub-assemblies that get handled wet will drift out of square, and a book nook is a square object by definition.
Losing the paper pieces. They are flat, light, and the same color as everything else on your desk. Keep them on the sheet.
Painting after assembly. It gets into the slots and the joints, and then nothing fits.
Kits I left off this list
Plastic Gunpla-style kits, die-cut paper kits, and metal sheet kits are all worth building, but they are different disciplines with different failure modes. A snap-fit plastic kit has no glue in it at all, and judging a wooden miniature kit by snap-fit standards is how you end up disappointed in a product that was never claiming to be one. This guide is about laser-cut wooden miniature scenes, and the two kits above are the ones I would hand a friend.
What this all costs
Both kits sit in the same band, so check the current Amazon price on each before you decide. The tools are the cheap part: a bottle of wood glue and a couple of sanding sticks cost less than a second kit, and if you build plastic models you already own the knife, the mat, and the tweezers.
The real budget line is time. A first build runs a weekend of evenings. The denser kit runs longer. Spread across the hours you actually spend at the bench, the cost per evening is small, which is the argument for buying the kit you want rather than the kit that is on sale.
The short version
Dry-fit everything. Sand tabs, never slots. Build in sub-assemblies and let them cure. Wire the light before the shell closes and leave the switch reachable. Do the paper details last.
That is the entire method, and it is the same method I use on a plastic kit, just with wood glue instead of cement. Do it in that order once and you will have a lit miniature scene on your shelf instead of a half-finished box in the corner.