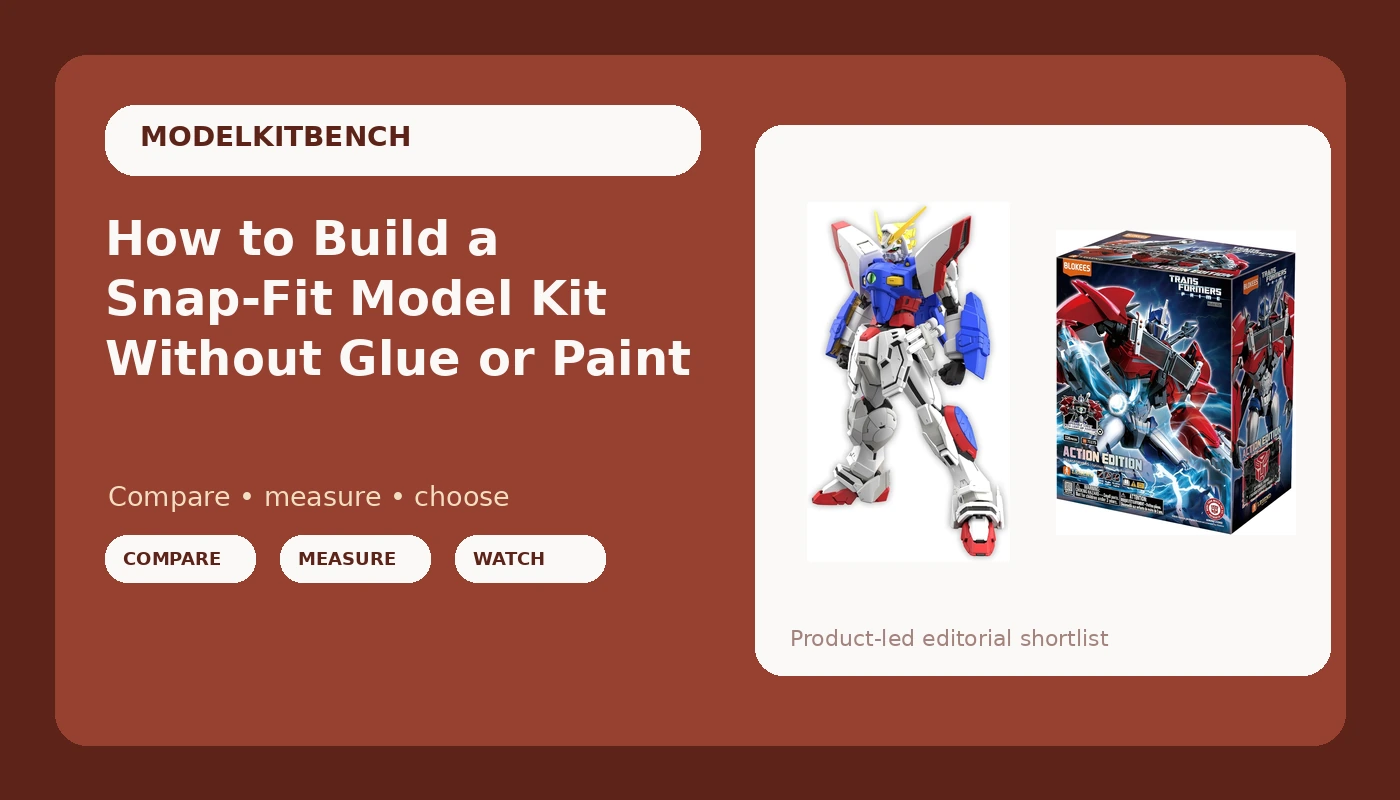
The first kit decides whether you stay in the hobby. A snap-fit model kit build strips away almost every excuse: no cement, no paint, no cutting, no waiting for glue to cure before the next step. You open the box, follow the manual, and a couple of hours later there is something on your shelf that did not exist that morning.
I have been building Gunpla since I was 11. That is 15 years of kits, 10 of them with an airbrush in hand, plus a backlog I will not live long enough to finish. Every kit I open gets the same treatment: a full build with no aftermarket parts, a part-fit scorecard, and an honest look at the seam lines.
This guide is the workflow I run on every kit, plus the two kits I would hand a beginner today. One of them cannot fight you at all. The other is the step up you take once the first one is finished.
Why you should trust me
I have judged local Gunpla competitions twice, which taught me more about part fit than any review I have written. When you are scoring 40 entries in a day, you stop caring about taste and start caring about engineering. Does the joint hold? Does the seam disappear? Did the decal survive warm water?
My rules have not changed. No reviews without a full build. No glue-dependent kit gets called snap-fit. No "beginner friendly" claim on a kit I have not built without tools. Fit is the soul of a kit, and a kit that needs glue where it should not is a bad kit no matter how good the box art looks. The box art is marketing. The sprue is the truth.
That is the lens for everything below.
How I picked and how I tested
I build every kit start to finish, straight from the box. No aftermarket parts, no third-party decals, no metal detail sets. Then I score four things:
- Does it hold together without glue? Snap-fit is the standard, not a bonus feature.
- Where are the gates? A gate on a visible surface means extra sanding and extra risk of a scar.
- Are the decals usable? A waterslide that shatters in warm water is an engineering failure, not user error.
- Would I build it again for fun? That is the real test, and it is the one most reviews skip.
The two kits below are what I would use to teach this workflow. One is a no-tools kit, which means the box promises no cutting, no glue, and no paint. The other is a Real Grade kit at 1/144, which is where the hobby starts getting interesting.
I am not quoting prices here. Kit prices move with reprints, import stock, and retailer sales, so check the live listing instead of trusting a number someone typed months ago.
Where to start
Beginners get told to buy a pile of tools on day one. You do not need them for the first build. You need a kit that fits, a clean table, and enough patience to read the manual before you start cutting.
The no-tools pick: BLOKEES - Transformers - Action Edition 06 - Optimus Prime - Transformers: Prime - Model Kit - Assembly Required - No Tools - No Cutting - No Glue - No Paint - 14+
 Visit on Amazon →
This is the kit I hand someone who has never built anything. The box makes four promises and every one of them matters: no tools, no cutting, no glue, no paint. That means no nippers, no hobby knife, no cement, and no paint list. The parts press together, the color comes molded into the plastic, and the build is a straight read of the manual.
That combination removes the three things that end first builds. A bad cut, a glued joint that sets crooked, and a paint job that goes wrong on step one. What is left is assembly, which is the part you actually want to learn.
It is also a licensed Transformers kit drawn from the Prime series, so the finished piece reads as Optimus Prime on the shelf rather than as a generic robot. For a kid or an adult who wants a first win, that matters more than a detail count.
Check current Amazon price before you order. Stock on licensed kits moves around, and reprints do not always land when you expect them.
Flaws but not dealbreakers: The 14+ rating is real, not lawyer boilerplate. Small parts and press-fit joints still need care, and a part forced in the wrong direction will show stress marks. Also, no paint means you get the colors in the box, so a custom finish is a different project later. Neither is a reason to skip it as a first build.
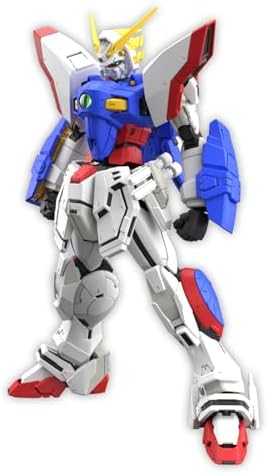
The next step: Bandai Hobby - G Gundam - #42 Shining Gundam RG 1/144 Model Kit
 Visit on Amazon →
The Real Grade line is Bandai's engineering showcase. The inner frames are the reason people collect them, and a 1/144 scale kit with that much internal structure is a completely different experience from a press-together beginner kit. Shining Gundam from G Gundam in RG form is a strong second or third build once the basics are automatic.
You will want a hobby nipper and a sanding stick here. The plastic is finer, the parts are smaller, and the fit tolerances are tighter, so a sloppy cut shows up in the finished model. That is not a flaw in the kit. It is the whole point of the grade.
RG kits are also more fragile than a modern high grade. Inner frame joints and thin armor pieces reward careful handling, and they do not enjoy being taken apart and reassembled repeatedly. Build it once, slowly, and leave it on the shelf.
Check current Amazon price before you commit. RG reprints come and go, and the listing is the only place that knows what is in stock today.
Flaws but not dealbreakers: This is not a first kit and I will not pretend it is. Small parts, tight tolerances, and a frame that rewards patience mean a total beginner will spend the first hour frustrated rather than impressed. Build the no-tools kit first, then come back here.
The actual build workflow
Here is the routine. It works on a press-together kit and it works on an RG.
Step one: clear the table and wash your hands. Work on a hard surface, not carpet. Carpet eats parts. Wash your hands so you are not pressing oil into the plastic, and keep a shallow tray or a bowl nearby for parts you have already cut.
Step two: read the manual end to end once. Not while building. Before. You want to know where the build is going, which parts are left and right, and which steps have you install a joint inside a part before you close it up. Closing a part around a forgotten joint means pulling it apart again.
Step three: cut twice, never flush. First cut takes the part off the runner with a nub still attached. Second cut trims the nub down. Cutting flush in one pass puts stress through the plastic and leaves a white mark you cannot sand out.
Step four: sand the nub flat. Start around 600 grit and finish around 1000. If the kit has under-gates, where the gate hides under the part instead of on a visible surface, you barely have to touch it. That is what good engineering buys you.
Step five: dry fit before you press. Seat the joint, feel for resistance, and check the orientation. If a part will not go, the answer is almost never more force. It is usually a flipped part or a nub you missed.
Step six: build in sub-assemblies. Head, torso, arms, legs. Finish each one before moving on. Assembling a whole robot in one pass makes it impossible to tell where a fit problem came from.
Step seven: panel line after assembly, not before. The recessed detail is easier to trace once the part is solid and you can see where the line actually runs. One pass of ink, let it dry, then clean the overflow.
Step eight: decals last, and give them time. Waterslides go on after the kit is built and after the panel lines are dry. Work one decal at a time, do not rush the water, and let everything sit overnight before you handle the model.
Panel lining and decals, the two skills worth learning next
Panel lining is the highest return per minute in this hobby. One pass of ink into the recessed lines makes a kit read as a model instead of a toy, and it takes maybe 20 minutes on a 1/144 kit. Do it after assembly, along the lines the mold already gave you. If a line does not exist, do not invent one with a marker. Scratched-in lines look like scratches.
Decals are the honesty test. A waterslide that shatters in warm water is a cursed sheet and there is no technique that fixes bad decal engineering. What you control is the setup: lukewarm water, not hot, a drop of setting solution under the decal, and a soft cloth to press it down without tearing it. Give each one a few seconds to slide free on its own. If you have to drag it off the backing paper, the water is not warm enough.
Where beginners lose a kit
The mistakes are consistent enough that I can list them.
Cutting flush with the runner instead of trimming in two passes. Gluing a joint the instructions call snap-fit, which turns a clean press-fit into a permanent crooked one. Painting parts on the runner before assembly, then watching the paint crack at every joint. Rushing decals at the end of a long session when your hands are tired. Working over carpet. Skipping the dry fit and forcing a part that was upside down.
None of these are talent problems. They are sequence problems, and the sequence above fixes all of them.
Other kits people will tell you to buy first
You will hear three pieces of advice, and two of them are fine.
High grade kits are the best value in the hobby. Modern HG kits fit like a dream and need zero glue, and they are a perfectly good place to start if you want a Bandai kit on day one.
Master grade kits are the sweet spot for detail and stability, and the 2.0 re-releases are some of the best engineering the hobby has ever seen. They are also a bigger commitment in time and money than a first build deserves.
Perfect grade kits are not a starting point. Neither are Real Grade kits, which is why the RG above is framed as a second step rather than a first one. Grade is not quality. A great HG beats a mediocre MG every time.
If you drift toward automotive or military subjects later, Tamiya's scale models are the gold standard on plastic quality. Revell is hit or miss: the new tooling is decent, and the old tooling is a test of your patience. That is a different guide.
What this costs
The no-tools kit is the cheaper entry point, and it needs nothing else in the box. The Real Grade is a bigger spend, and it comes with a small tool bill: nippers, a sanding stick, and a bottle of panel line ink. That is the entire kit for the first year of the hobby, and it is less than people assume before they start.
I am not printing prices because they change. Check current Amazon price on each listing, and compare against your local hobby shop, which is where you will want to be anyway when you need a single bottle of paint at 8 p.m.
The math that matters is not the kit. It is the two hours it takes to build the first one correctly, with clean nubs, seated joints, and no glue anywhere it does not belong. Do that once and every kit after it is easier.
That is the job. Open the box, read the manual, and let the kit do what it was engineered to do.