Most first model kits do not fail at the paint stage. They fail on the runner. You cut a part free, leave a white stress mark where the nub used to be, decide the whole thing is ruined, and the box slides back onto the shelf next to the other unfinished ones.
I have that shelf. Every builder I know has that shelf. A beginner model kit build is not really a test of steady hands. It is a test of what you are willing to leave imperfect, and the people who finish kits are the ones who learned that early, usually the hard way.
This is the workflow I run on every kit that crosses my bench, plus the two things that shorten the learning curve: a cheap robot car kit that hands you dozens of low-stakes mistakes to make on purpose, and a short book about perfectionism that I did not expect to need and now recommend constantly.
Why you should trust me
I am Kenji. I built my first Gundam kit at 11 and never stopped. Fifteen years of Gunpla, ten years behind an airbrush, and a backlog that will outlive me. I work in IT to fund the plastic habit, and I have judged local Gunpla competitions twice.
Every kit I write about gets the same treatment: a full build with no aftermarket parts, a part-fit scorecard, and a seam line honesty check. No resin conversions, no third-party detail sets, no borrowed tools. If a kit needs glue where the manual says snap-fit, I say so. If the gates sit on a visible surface, I say so. The box art is marketing. The sprue is the truth.
How I picked and how I tested
The two items below are not a which-kit-should-you-buy list. This is a how-to guide, so the question is what belongs on the bench while you learn. Everything here earned its spot by surviving my own workflow.
The robot car kit got a complete build, start to finish, in my garage workshop, with the same nippers and the same sanding sticks I use on Gunpla. I wanted to know whether a first-timer could assemble it without special tools, and whether the instructions would hold up when a step went sideways.
The book got read over three evenings between sanding sessions, which is exactly when the subject matter bites. Nobody needs a chapter on grace while the build is going well. You need it when you have just sanded through a panel line on a part you cannot replace.
I did not measure anything for this article. There is no part-fit scorecard for a book and no delta on a philosophy. What I can tell you is what changed in my own builds after I stopped treating every scratch as a verdict.
The two things I keep on the bench
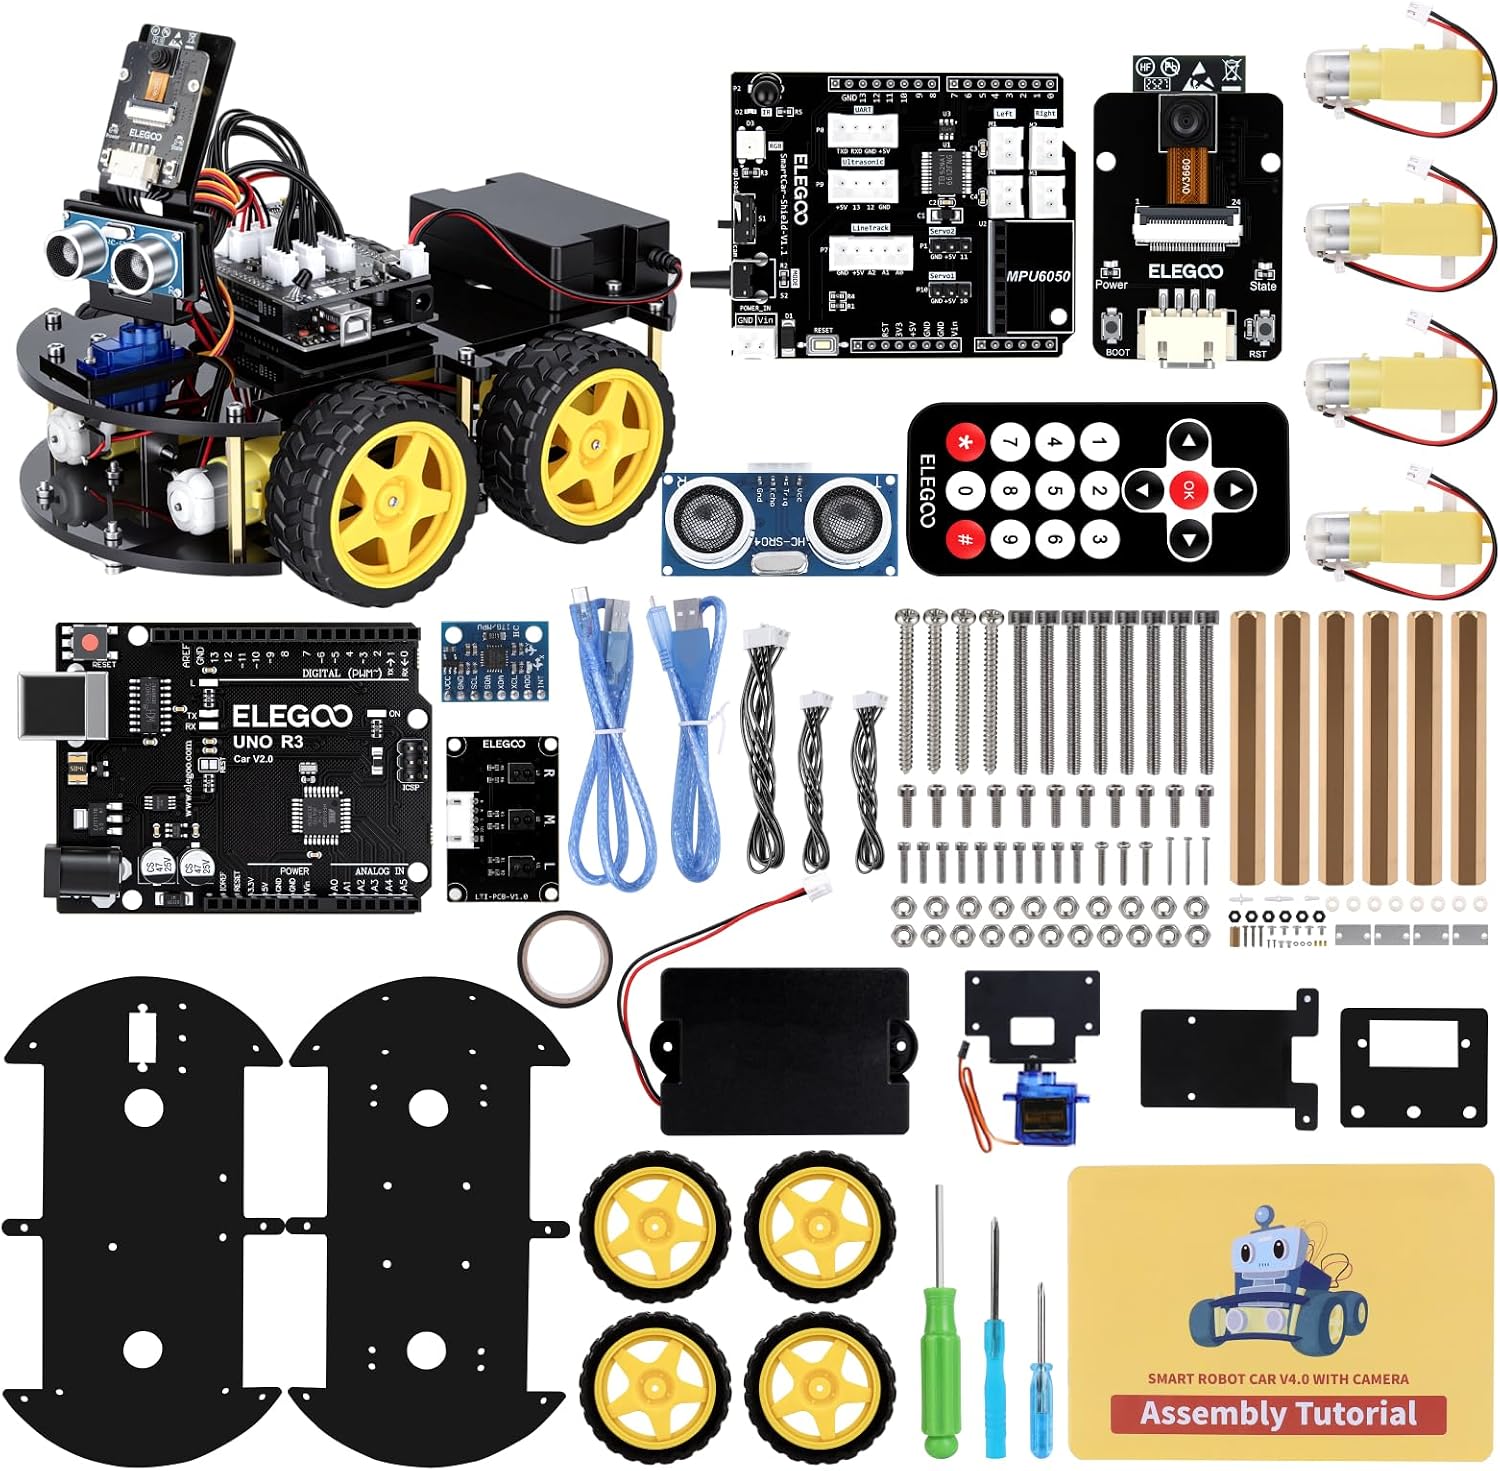
Our pick: ELEGOO UNO R3 Smart Robot Car Kit V4 with Camera, Compatible with Arduino
 Visit on Amazon →
A model kit site recommending a robot car kit sounds like a detour. It is not. The reason I hand this one to beginners is that it is a build where mistakes are cheap and visible. You will mount a bracket backward. You will plug a cable into the wrong header. You will take apart a subassembly you just finished, and the plastic will survive it.
That is the lesson that transfers. On a Gunpla kit, the fear is that one bad cut ruins a part you cannot replace. On the car kit, the fear evaporates because you can unbolt the whole thing and start again. Once your hands learn that a mistake is just a step you repeat, your nipper work gets calmer, and calm hands cut cleaner nubs.
The camera module is what makes it worth building over a plain chassis kit. Getting a camera to actually feed an image means slowing down and reading the wiring diagram instead of guessing, and that habit carries straight back to reading a model kit manual properly. Check current Amazon price.
Flaws but not dealbreakers: The instructions are translated and occasionally terse, and the wiring section expects you to match colors carefully. If you skip a step, you find out later. That is annoying, and it is also the point.
Anyone who wants to practice being wrong without wrecking a display kit should start here.
The mindset pick: You Will Make Mistakes: Discovering God's Grace in the Midst of Perfectionism
 Visit on Amazon →
This is the one that surprised me. I picked it up because a hobby shop owner I trust told me it was not what the cover suggests, and he was right. It is a short book about perfectionism, written from a Christian perspective, and it lands on the exact nerve that stops modelers from finishing.
Perfectionism in this hobby does not look like arrogance. It looks like a half-built kit in a box because the seam line on the shoulder is not perfect yet. It looks like repainting the same part four times. It looks like never entering a competition because your build is not ready.
The book's argument, stripped to one line, is that the mistake is not the failure. The refusal to continue after the mistake is. I read a chapter, went back to the bench, and finished a kit I had been avoiding for two months. That is a strange sentence to write in a model kit article, and it is true. Check current Amazon price.
Flaws but not dealbreakers: It is explicitly a faith-based book, and if that is not what you want from your hobby reading, it will not land. The writing is warm rather than technical. There is no chapter on sanding.
Anyone with a shelf of unfinished kits and a nagging voice about it should read this between build sessions.
The actual workflow
Now the part you came for. This sequence works on any snap-fit kit, from a high grade to a master grade, and it assumes no aftermarket parts.
Step one: Read the manual once, cover to cover, before you cut anything. Not while building. Before. You are looking for the steps where the manual has you install a part that gets trapped later. Every kit has one. Finding it in advance is the difference between a clean build and a disassembly.
Step two: Cut wide, then trim. Do not cut flush against the part. Leave a millimeter of gate, then shave it down with a sharp blade or a sanding stick. Flush cutting with dull nippers is where white stress marks come from, and stress marks do not come out with paint the way people hope.
Step three: Sand the nub in one direction. Work from 400 grit to 800 to 1000, always the same direction, then finish with a nail buffer. The goal is a flat surface, not a shiny one. A shiny nub catches light and shows up under a topcoat.
Step four: Dry-fit every joint before you commit. Snap it together, feel the fit, take it apart. If a peg is tight, shave a sliver off rather than forcing it. Forcing a peg is how you crack a socket, and a cracked socket is a glue repair on a kit that did not need glue.
Step five: Panel line before assembly where you can. Recessed detail is easier to reach on a flat part than on a finished limb. One pass of a fine liner or a thinned enamel wash, let it dry, clean the excess with a lighter fluid dampened swab. Less is more. A panel line should read as a shadow, not a drawing.
Step six: Decals last, and slowly. Waterslides need warm water, a soft brush to slide them off the backing, and a setting solution if the surface is curved. If a decal shatters, that is a manufacturing problem, not a you problem. Move to the next one and do not let it ruin the session.
Step seven: Topcoat when the build is done, not before. A flat clear coat unifies the plastic sheen, hides minor sanding marks, and locks the decals down. Two thin passes beat one wet pass. Rush this step and you get frosting, and frosting is the only mistake in this list that is genuinely hard to undo.
If you break a part, and you will, stop. Put it down. The car kit exists precisely so you can have that moment on something cheap. The book exists so you can have that moment without deciding you are not a builder.
The competition and why it lost
A few things that did not make the bench, and why.
Bandai high grade kits are the best value in the hobby, and I will argue that with anyone. Modern high grades fit like a dream and need zero glue. But an HG is a display piece, not a practice ground. Snap a shoulder peg on an HG and you have a repair on your hands with no spare in the box. The robot car kit teaches the same lesson with a parts bag and a screwdriver.
Real grade and master grade kits are the next step, and they are not where you start. RG inner frames are engineering showcases and fragile in the hands of someone still learning how much pressure a peg can take. MG kits are the sweet spot for detail and stability, and the 2.0 re-releases are some of the best engineering the hobby has seen. None of that matters if the first kit is still in the box.
Tamiya's scale models are the gold standard for automotive and military work, and the plastic quality is unmatched. They are also a different discipline, with different paints and different tolerances. Revell is hit or miss. The new tooling is decent, the old tooling is a test of your patience, and a beginner cannot tell which one they bought until the box is open.
On the book side, most hobby reading is technique. Airbrushing guides, weathering references, photo books of other people's builds. Those are useful later. None of them address the reason the kit is still in the box, which is almost never technique.
What this all costs
I am not going to quote prices, because they move and because that is not the number that matters. Here is the honest math.
The car kit costs less than most single master grade kits, and it survives being rebuilt. Check current Amazon price before you decide, but the real comparison is not kit versus kit. It is one practice build versus another unfinished display kit on the shelf.
The book costs less than a jar of paint. Check current Amazon price. If it saves one kit from the shelf of shame, it has paid for itself several times over in plastic alone.
The tools are where the money goes, and they are worth it: a good pair of single-blade nippers, sanding sticks from 400 to 1000, a fine panel line pen, a bottle of setting solution, and a can of flat clear. Buy those once and they outlast a dozen kits.
What you are actually buying with both of these items is permission to be bad at something while you get better. That is the cheapest upgrade in the hobby.
Build the car. Break something. Read a chapter while the paint dries. Then go back to the shelf, pull down the kit you have been avoiding, and finish it badly. A finished bad kit teaches you more than a perfect one you never started, and the second build is always better than the first.
Your nippers are waiting.