Every beginner Gundam model kit has the same first ten minutes. You open the box, you slide out a stack of sprues in gray and white plastic, and you stop. You know the parts are supposed to come off the runner. You do not know where to cut, how close to cut, or what happens if you get it wrong. The box art shows a finished machine standing on a hangar deck. The sprue shows a pile of plastic and a manual written in pictures.
The good news is that this hobby is far more forgiving than it looks. A modern snap-fit kit needs no glue, no paint, and no workshop. It needs nippers, a sanding stick, and one evening. Everything past that is technique, and technique is something you can learn inside a single build.
What follows is the whole process in order: the two kits I would put on a beginner's bench, the four questions I ask before I recommend any kit at all, the eight steps that take you from sealed box to finished model, and the mistakes that send good kits to the shelf of shame.
Why you should trust me
I built my first Gundam kit at 11 and never stopped. That is 15 years of Gunpla behind me, and 10 of those with an airbrush in hand. I have judged local Gunpla competitions twice, and judging changes how you look at a kit. It forces you past the pose and the box art and into gate placement, seam lines, and part fit.
My rule for this site is the same rule I use at the bench: no kit gets called beginner friendly unless I would hand it to someone who owns nothing but nippers. I work every kit the same way, a full build with no aftermarket parts, a part-fit scorecard, and an honesty check on the seam lines. I also own a backlog that will outlive me, which is the most honest credential in this hobby.
How I judge a kit before I recommend it
Four questions, in order.
First, does it fit without glue? Snap-fit is the standard now. A kit that needs cement where the box promises no glue is a kit I will tell you to skip, no matter how good it looks on the shelf.
Second, where are the gates? A gate on a visible surface means extra sanding and extra risk of a scar on the shoulder armor. A gate hidden under the part, the under-gate, is the mark of engineering that respects your time.
Third, how is the color separation? Parts molded in the right color mean you can finish the kit with zero paint and still get something that reads like the box. Kits that mold everything in one shade are kits that quietly demand a paint budget.
Fourth, are the decals usable? Waterslides that shatter in warm water are a design failure, not a user error. A bad sheet makes a good kit a worse value.
Notice what is not on that list: part count, box size, and grade. Grade is not quality. A great HG beats a mediocre MG every time, and a beginner is better served by a kit that fits than by a kit that impresses on a shelf.
What to put on the bench first
Two kits cover the entire starting experience: one to build, and one to warm up on.
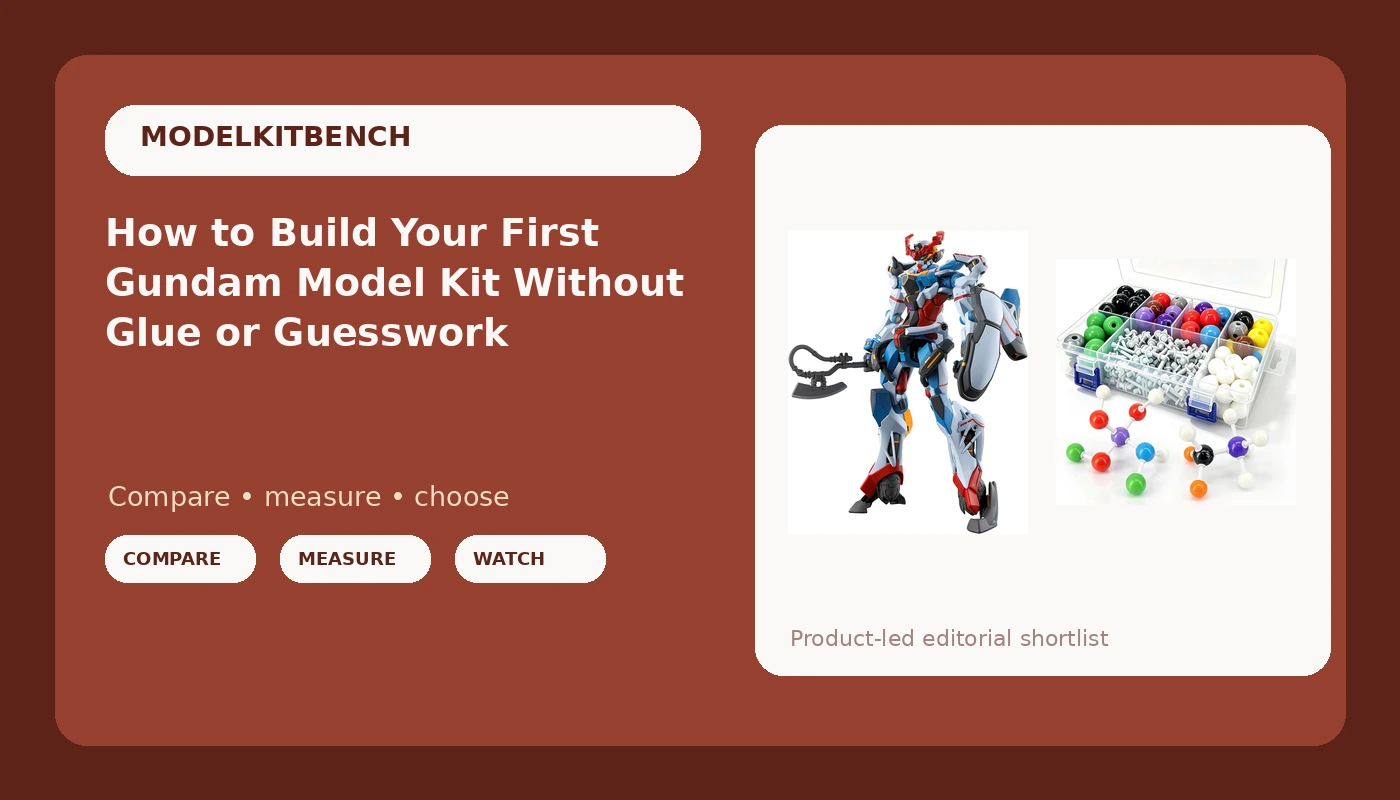
Our pick: Bandai Hobby - Mobile Suit Gundam GQuuuuuuX - #1 GQuuuuuuX HG 1/144 Model Kit
 Visit on Amazon →
An HG in 1/144 is the right first grade, and this is the right kind of HG: a modern Bandai snap-fit kit with the engineering that makes HG the best value in the hobby. The scale keeps the finished model small enough to live on a desk shelf, so you are not shopping for a display case before you have finished your first build. The parts press together and hold. You will not need glue, and you will not need paint to get a result that reads correctly from across the room.
The build is also short enough to finish in one sitting, which matters more than beginners expect. A kit you finish teaches you more than a kit you stall on.
Flaws but not dealbreakers: 1/144 parts are small, and small parts are the ones that launch off the tweezers into carpet. Work over a tray. The scale also means fine detail is simplified compared to larger grades, so if you want visible inner frames and opening hatches, that is a different grade and a different budget.
This is the kit to buy if you have never built anything and you want the hobby to click on the first try.
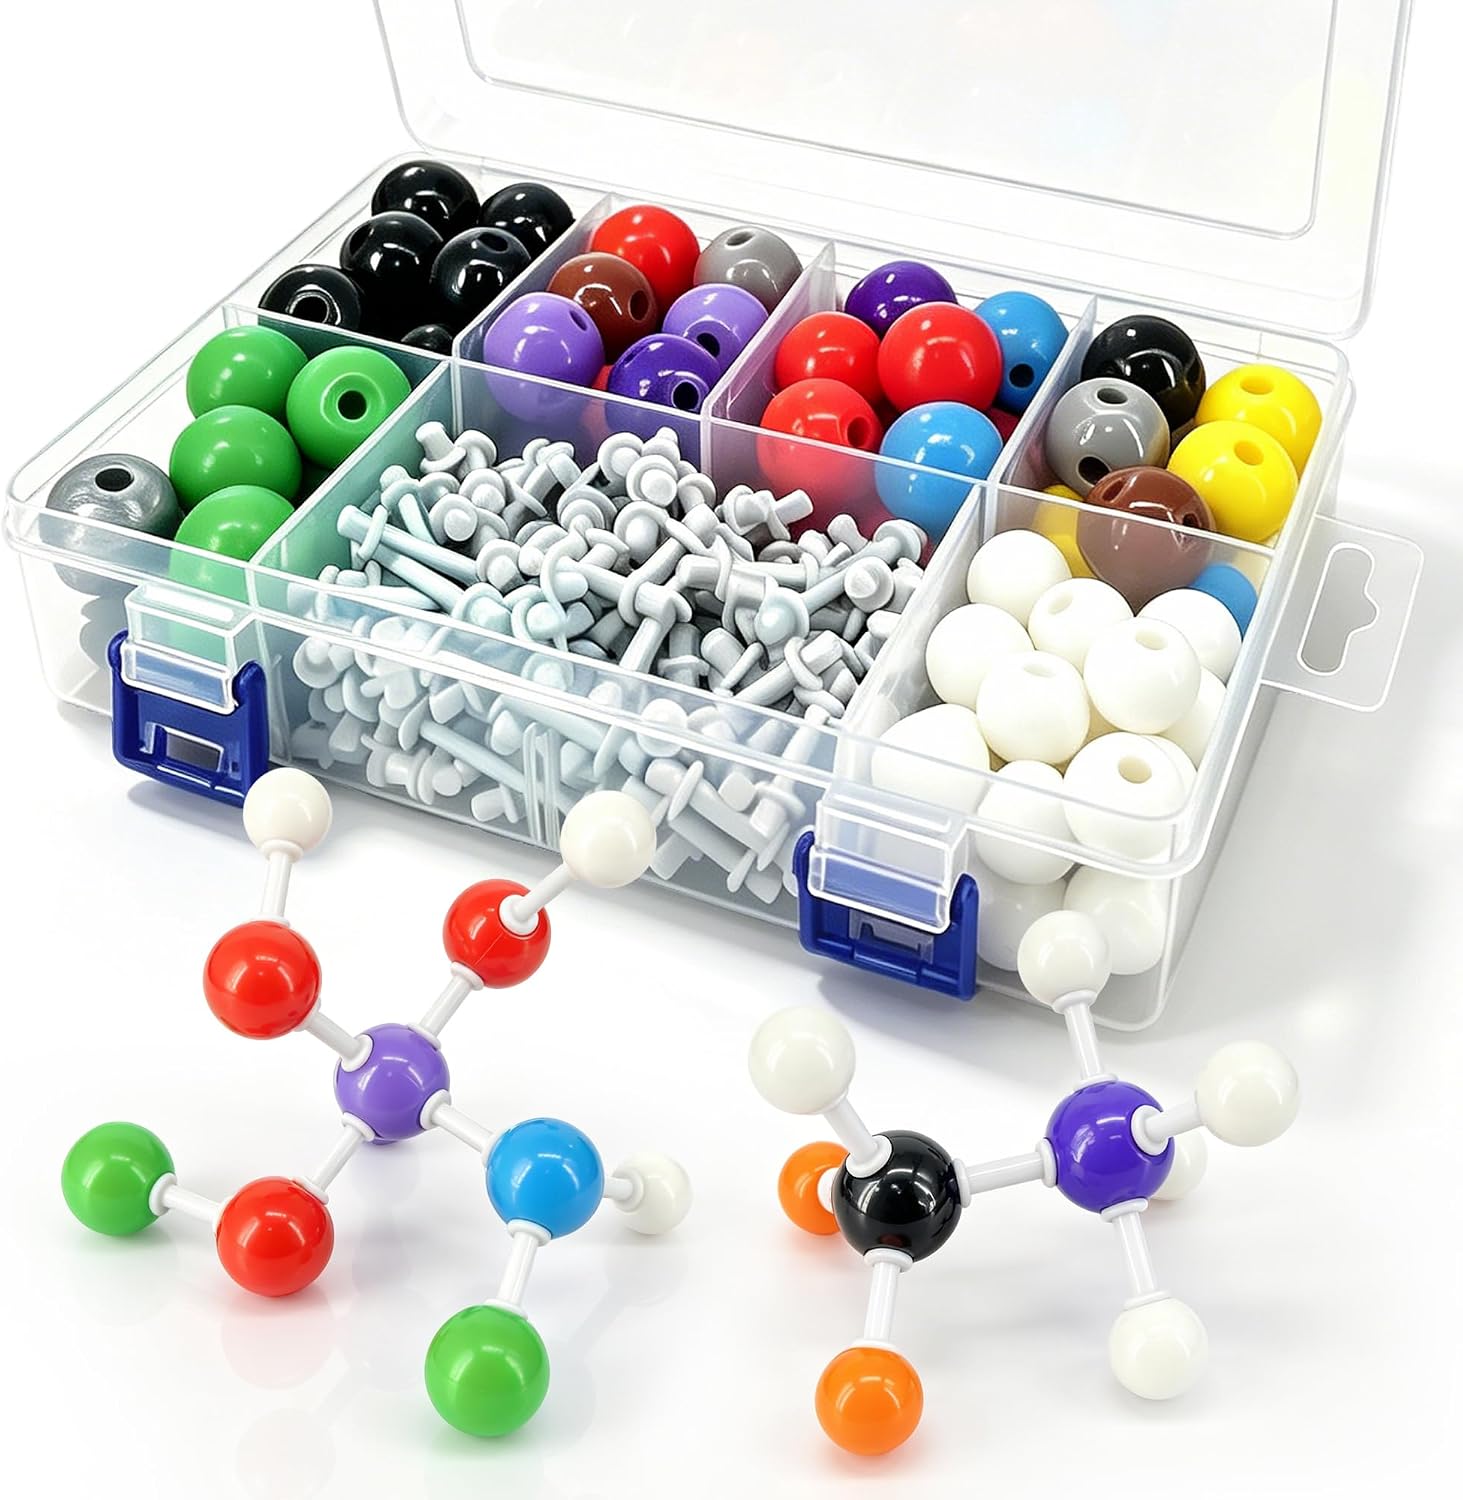
The warm-up kit: Molecular Model Kit(240 Pieces),Organic Chemistry Model Kit for Organic and Inorganic Chemistry Learning,Chemistry Set,A Fullerene Set
 Visit on Amazon →
I know how this looks. It is a chemistry set, not a Gunpla. But the core skill of this hobby is reading how two pieces are meant to connect before you commit, and this kit drills that skill hundreds of times with zero risk. Every joint is press-fit. Every connection has one correct orientation. Force it the wrong way and you learn immediately, and nothing is ruined.
It earns a place on a beginner's bench for three reasons. It teaches press-fit discipline, so your first snap-fit kit feels familiar instead of frightening. It is the cheapest way to find out whether a younger builder has the patience for small parts before you hand them nippers. And it survives being taken apart and rebuilt, which means you can practice one connection ten times instead of once.
Flaws but not dealbreakers: It will not teach you nub removal, sanding, panel lining, or finishing, and those skills are most of what makes a model kit look good. The joints are also designed to come apart, so the fit tolerance is looser than any Bandai kit you will build. Treat it as a warm-up and a teaching tool, not as a substitute for a real model.
Buy it if you are teaching a kid, if you want something to keep your hands busy while paint dries, or if you want to build the connection-reading habit before you cut your first part off a runner.
The actual build, in eight steps
Step one: Sort the sprues before you cut anything. Open the manual to the sprue map and lay the runners out in alphabetical order. Read the whole assembly sequence once without touching a part. Five minutes of reading saves an hour of confusion, and it tells you which assemblies come first, so you are not holding a half-built torso while you hunt for a shoulder.
Step two: Cut with nippers and leave a nub. Never twist a part off the runner, and never bend the runner until the part snaps free. That is how you get stress marks, the white stretch marks in the plastic that no amount of sanding fully removes. Cut the gate a few millimeters away from the part first, then trim the leftover nub with a second, closer cut. Two small cuts beat one brave one.
Step three: Sand the nub flush. Work the nub down with a sanding stick or a piece of 600 grit, smooth it with 1000 grit, then rub the spot with your thumbnail or a cloth to bring the sheen back. On white and light gray plastic this is nearly invisible. On dark glossy plastic, sanding marks show, so go slower and finish finer.
Step four: Dry-fit every sub-assembly before you commit. Press the pieces together without forcing anything, check for gaps, and check the orientation against the manual. If a part will not seat, the answer is almost never more pressure. It is usually a nub you missed or a part facing the wrong way.
Step five: Panel line the sub-assemblies, not the finished body. A panel line is the recessed detail that makes a kit pop with one pass of ink. Do it while the piece is still loose in your hand. Reaching a line under an arm on a fully assembled kit is a chore, and it is a chore you can avoid for free.
Step six: Save the stickers and decals for last. Press each one down with a dry cotton swab so it sits flat in the recess. Stickers hide the panel lines they cross, which is why they go on after the ink is dry, not before.
Step seven: Final assembly, then a joint check. Move every joint through its range before you pose the model. If something is tight, work it loose slowly and gently. If something is loose, a thin layer of clear nail polish on the peg will tighten it. Never force a joint that has stopped moving.
Step eight: Topcoat. A matte clear coat unifies the plastic, kills the toy-like shine, and hides the edges of stickers. Spray in light passes from a comfortable distance, and avoid high humidity. This single step is what makes a straight, unpainted build look intentional.
Mistakes that ruin a first build
Twisting parts off the runner. Stress marks are permanent, and they show up worst on dark plastic.
Cutting flush with the part in one snip. The gate pulls the plastic with it, and you get a gouge instead of a nub.
Gluing a snap-fit kit. It does not need it, and cement on a press-fit joint makes a mess that is hard to hide. Glue is for seam filling, and seam filling is a second-kit skill.
Starting with an RG. RG kits are engineering showcases and the inner frames are incredible, but they are fragile, and fragile is a bad first lesson.
Painting before you can sand. An airbrush amplifies a bad nub, it does not hide one.
Chasing a perfect first build. Your first kit is a lesson, not a portfolio piece. Build it, finish it, and put it on the shelf where you can see how far the second one comes.
What the first build actually costs you
Less than most people assume, because the expensive parts of this hobby are optional. You do not need an airbrush, a paint set, an aftermarket decal sheet, or a display case to build either kit above. You need nippers, something to sand with, and a tray so small parts do not vanish into the carpet.
Everything else is a second-kit purchase. Add a panel line marker when you want the details to read. Add topcoat when you want the plastic to stop looking like plastic. Add paint when you want a specific color the kit does not give you. Prices move on both listings, so check the listings before you buy, and do not let a sale talk you into a bigger kit than you are ready to finish.
That is the whole path: one kit that fits, one warm-up that teaches your hands what a connection feels like, eight steps, and a shelf. The box art is marketing. The sprue is the truth, and now you know how to read it.