Most people who ask me how to start building cars assume there is one kind of box. There isn't. A model car kit can be a 1:24 scale plastic kit where every part is molded, gated, and waiting for a clean paint job, or it can be a programmable chassis with a motor, a camera, and a microcontroller board where the build is half assembly and half code. Both are real car builds. Both teach skills the other one will not. Picking the wrong box for your temperament is the fastest way to quit in week one.
I have been building scale kits for twenty-five years, judged local competitions twice, and spent the last decade airbrushing everything from Gunpla inner frames to American muscle cars. My rule has not changed since my first kit: part fit is the soul of a kit. A kit that needs glue where it should snap is a bad kit, no matter how good the box art looks. And the box art is marketing. The sprue is the truth.
So this is the walkthrough I give to friends who want to build a car. What to buy first, how to prep the parts so you do not fight them later, how to get a finish worth displaying, and how to know when you should have bought the other kind of box entirely.
Why you should trust me
I build every kit the same way: a full build with no aftermarket parts, a part-fit scorecard, and a seam line honesty check. No resin conversions, no photo-etch, no "it looks great once you replace half of it." If a kit needs putty in a place the designer should have hidden, I write it down. If the decals shatter in warm water, that is a design failure and I say so.
That habit comes from a hobby shop owner who watched me hack a nub off with a dull knife and then spent twenty minutes teaching me to sand properly. He was right. Almost every problem beginners have with a car kit traces back to two things: cutting parts wrong and assembling before dry fitting. Neither is about talent.
How I judge a car kit before I recommend it
Four questions, in this order.
Does it fit without glue? For plastic scale kits, some cement is normal at the body, the glass, and the chrome. A kit that needs cement at every panel line is a kit with sloppy engineering. For the robot kits, the equivalent is whether the chassis plates line up with the holes they were drilled for and whether the connectors seat without force.
Where are the gates? A gate is where the part attaches to the sprue. Good engineering puts those gates on hidden surfaces: under the fender, inside the wheel well, on the back of a seat. Gates on visible surfaces mean extra sanding and extra risk of flat spots.
Are the decals usable? Decal quality is engineering, not luck. A sheet that behaves in warm water and slides off the backing is a sheet you can work with. A sheet that curls, tears, or refuses to release is a sheet that will cost you an afternoon and a paint job.
Would I build it again for fun? That is the real test. Some kits are a chore that produces a shelf piece. Others are an evening that disappears pleasantly. I recommend the second kind.
I apply those questions to both of the kits below, and I will tell you plainly which one suits which builder.
Two ways to build a car
There is no single right answer here, which is exactly why the first purchase matters so much. Here is how the two boxes differ in practice.
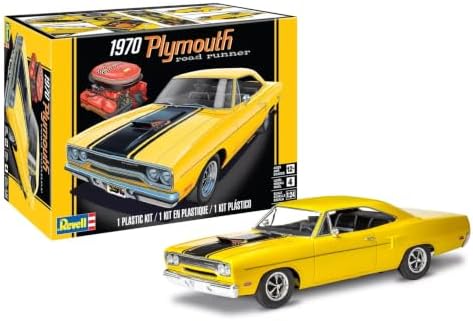
The scale build: Revell 1970 Plymouth Road Runner Plastic Car Model Building Kit 1:24 Scale
 Visit on Amazon →
This is the traditional path: a 1:24 scale plastic kit of a 1970 Plymouth Road Runner, molded in styrene, built up from subassemblies into a complete car. It is the box you buy if you want the craft side of the hobby, meaning sanding, seam work, primer, paint, and a body that looks like metal when you are done.
The Road Runner is a good subject for a first or second scale car because the shape is simple and honest. Long hood, flat flanks, a grille you can mask with tape. There is less fussy chrome trim than you get on some European sports cars, which means fewer chances to smear paint on a plated part.
Revell is hit or miss as a brand, and I will not pretend otherwise. The new tooling is decent and builds up cleanly. The old tooling, the molds that have been in circulation for decades, will test your patience with flash, soft detail, and gates in annoying places. Check the listing and the buyer feedback for the specific release before you commit, because the name on the box does not tell you which era of tooling you are getting.
Flaws but not dealbreakers: This is a cement-and-paint kit, not a snap-together toy. If you wanted to open a box and have a car in an hour with no tools, this is not that box. It also assumes you own nippers and something to sand with.
Anyone who wants to learn finishing, masking, and decal work, and who does not mind a bench that smells like cement for a few evenings, should start here.
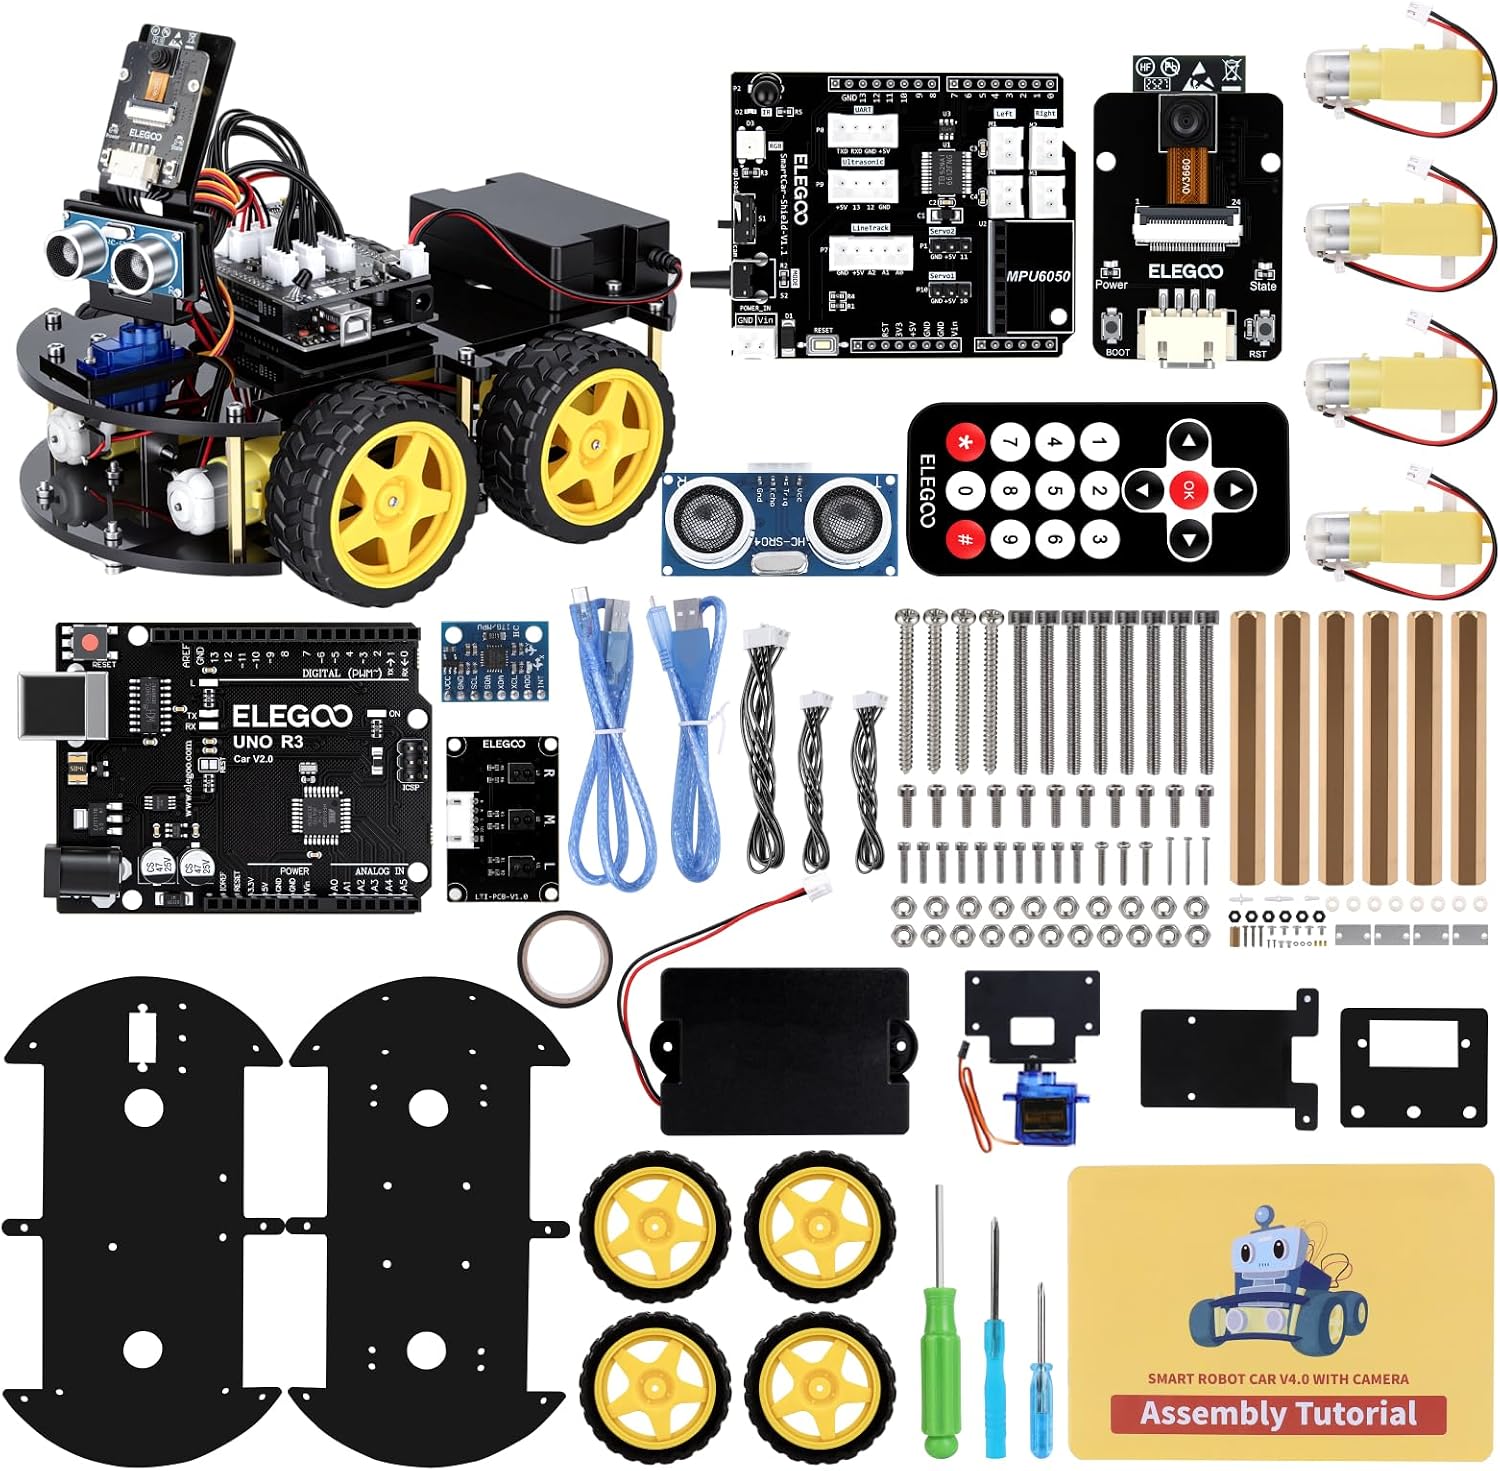
The electronics build: ELEGOO UNO R3 Smart Robot Car Kit V4 with Camera, Compatible with Arduino
 Visit on Amazon →
This is the other kind of car kit, and it is a completely different hobby wearing a similar name. You get a chassis, wheels, motors, a controller board compatible with Arduino, a camera module, wiring, and a build guide that walks you through assembly and then through making the thing move, see, and follow a line or a face.
The skills here are mechanical assembly and troubleshooting, not finishing. You will learn to route cables so they do not snag on a wheel, to seat connectors the right way around, and to read a wiring diagram without guessing. You will also learn the single most valuable habit in electronics: test each subsystem before you bolt the whole thing together.
Flaws but not dealbreakers: The camera and the sensor work are only as good as the code you load and the light in your room, so expect to spend as much time at a laptop as at the bench. Battery life on a chassis this size is measured in sessions, not days, so budget for rechargeables. And the finish, the part that scale builders obsess over, is basically whatever color the plastic came in.
Anyone who likes tinkering, wiring, and problem solving more than painting should start here. Anyone who wants a display piece should not.
The build workflow, step by step
The two kits share more process than you would expect. Here is the order that keeps you out of trouble on either one.
Step one: Read the instructions all the way through, twice. The first pass tells you what the build is. The second pass tells you where the traps are: a part that has to be painted before it gets buried inside the body, a step that requires three hands, a subassembly that must be finished before it is glued in. I have never once regretted this step and I have regretted skipping it many times.
Step two: Set up the bench before you open the bag. Good light, a surface you can lose a tiny part on and still find it, a tray or a few cups for parts in progress, and your tools laid out. Do not dump every sprue into one pile. Keep them bagged or stacked in order and pull only what the current step needs.
Step three: Cut, then sand. Cut the part off the runner with side cutters made for plastic, and leave a small nub. Do not cut flush against the part, because that is how you gouge the surface and create a flat spot you cannot fix. Then take the nub down with a sanding stick, working from coarse to fine until it is flush. This is the hobby's first real skill and it is worth the patience. On the robot kit, the same discipline applies to the chassis plates: trim any molding flash before you start bolting things together, not after.
Step four: Dry fit everything. Hold the parts together with no cement, no screws, no force. If a joint will not close, find out why before you commit. On the scale kit, that usually means a locating pin is slightly too thick or a bit of flash is blocking the seam. On the robot kit, it usually means a connector is keyed and you have it upside down. Forcing either one is how you break a part you cannot replace.
Step five: Build in subassemblies. On the car kit, do the engine, the interior, and the chassis as separate units, then marry them to the body last. Paint and detail are much easier while the parts are still loose. On the robot kit, build the chassis and drivetrain first, then mount the board and the camera last so you are not working around delicate electronics.
Step six: Handle the seams honestly. Where two body panels meet, there will be a line. Some of it is real panel gap and should stay. Some of it is a mold seam that the designer hid well, which means you leave it alone. Some of it is a seam the designer should have hidden and did not, and that is where putty goes. Do not putty everything by reflex. Look at reference photos of the real car and decide which lines belong.
Step seven: Test the moving parts before final assembly. This is the step beginners skip. On the robot kit, power up and confirm the motors spin the right direction and the camera feed works before you close everything up. On the scale kit, roll the chassis across the bench and confirm the wheels sit flat and turn freely. Finding a problem now costs minutes. Finding it after final assembly costs a disassembly.
Step eight: Paint in thin coats. Primer first, then color in several light passes rather than one heavy one. A heavy coat hides detail, pools in panel lines, and stays soft for days. Thin coats feel slow and dry fast. If you are brushing rather than spraying, the same rule applies: thin the paint and accept two or three passes. Let it cure fully before you handle the body, and handle it with clean hands or a cloth.
Step nine: Decals last, on a glossy surface. Waterslides behave best on a smooth, slightly glossy surface, so if you have clear coated the body, apply decals before your final flat coat. Warm water, a few seconds of soak, and patience. If a decal refuses to slide, leave it in the water a bit longer rather than dragging it off the paper and tearing it.
Where beginners go wrong
The mistakes are consistent enough that I can list them from memory.
Gluing before dry fitting. This is the big one. Cement melts plastic, so a joint you force together with cement is a joint that will be misaligned forever. Dry fit, fix, then glue.
Cutting parts flush against the part. Leave the nub and sand it. It takes ten extra seconds and saves the surface.
Skipping primer. Paint does not stick to bare styrene as well as it sticks to primer, and primer also shows you the seams and scratches you missed while you can still fix them.
Handling a painted body with bare fingers. Skin oils and fingerprints on fresh paint are permanent. Set the body on a stand or hold it by the inside of the wheel wells.
Over-tightening screws on a robot chassis. Plastic threads strip easily. Snug is enough, and a stripped post means the plate never sits flat again.
Running motors before checking the wiring. A reversed connector or a pinched wire is easy to fix on the bench and annoying to fix after you have buttoned everything up.
Buying the airbrush before the nippers. The tool that changes your results most is a clean cut and a smooth sand, not the spray gun.
What this all costs
Here is the honest math. The kits themselves are the cheap part. The Revell car kit is a single purchase, and you can check the current listing for the number. The ELEGOO kit is a single purchase as well. Neither one is the expensive decision.
The expensive decision is tools, and it is expensive because it is spread over every kit you will ever build. A good pair of plastic nippers, a set of sanding sticks, a hobby knife, cement, putty, primer, and a couple of paint colors will cost more than either kit on its own. The airbrush and compressor cost more than everything else combined, and you do not need them for your first three builds.
My advice is to buy tools in the order you need them. Nippers and sanding first. Cement and putty when you start a scale kit. Primer and paint when you are ready to finish one. The robot kit has its own small list: a screwdriver that fits, batteries or a rechargeable pack, and a computer you already own.
Over a year of building, the cost per evening is lower than almost any other hobby I have tried. The kits are cheap. The skills are what you are buying.
The bottom line
Pick the box that matches the work you actually enjoy. If you like the idea of sanding a seam until it disappears, masking a grille, and watching a body come up in color under a thin coat of paint, the Revell Road Runner is your entry point, and it will teach you the craft properly. If you would rather wire a chassis, debug why one motor runs backward, and get a camera to follow a line on the floor, the ELEGOO kit is the one that will keep you up late in the good way.
Either way, the process is the same: read first, cut clean, dry fit, and test before you close anything up. Do that and your first car build will not be your last, no matter which box you opened.