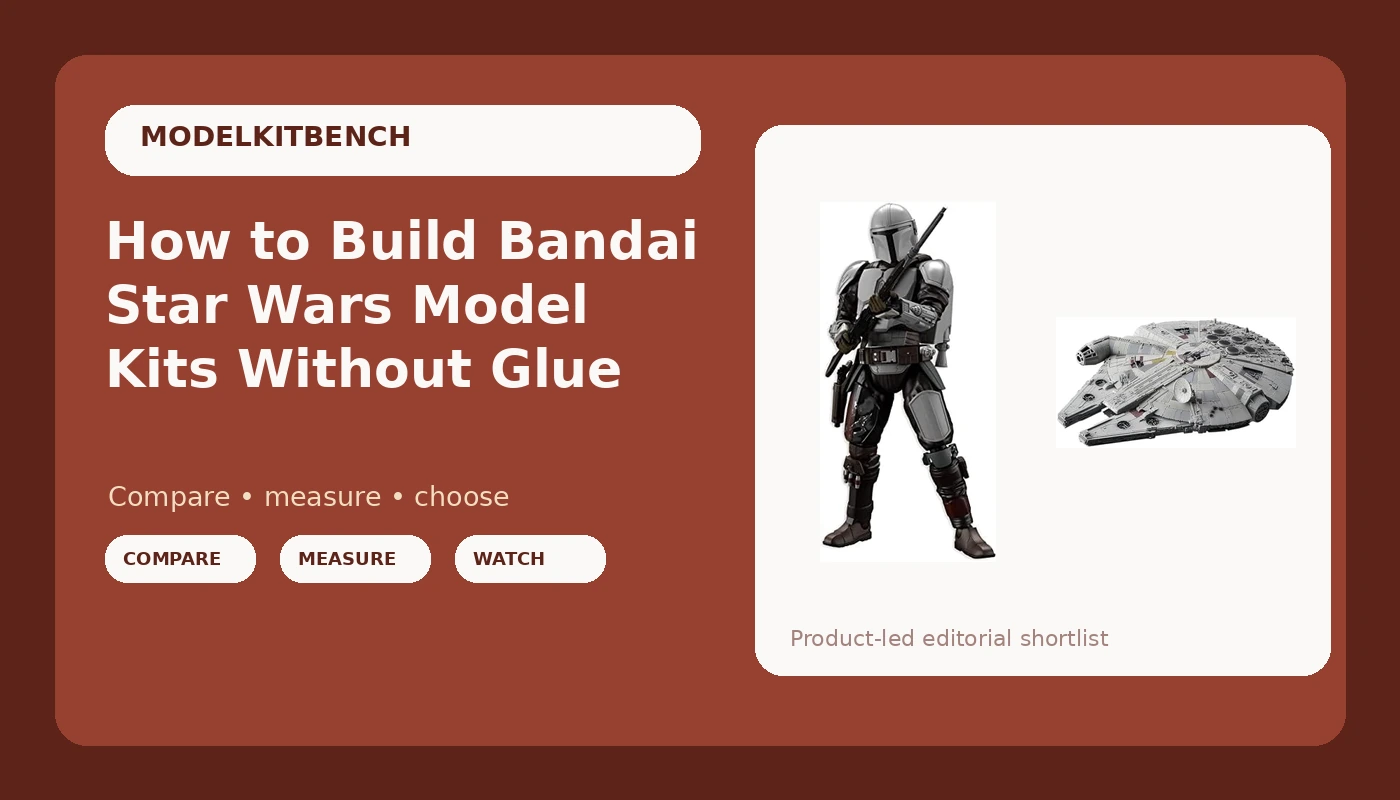
The Bandai Star Wars model kit shelf at your local shop is quietly the best beginner on-ramp in the hobby. Not because the subjects are famous, but because the engineering underneath them is honest. Parts snap. Colors are molded. The gates mostly hide where you cannot see them.
Most people who buy one of these boxes expect a toy and get an engineering exercise. That surprise cuts both ways. The good news is that you need almost no tools to finish one. The bad news is that the skills that make the finished thing look like the box art are the same skills Gunpla builders spend years sharpening, and nobody hands you a scorecard.
That is what this is. A build workflow for the two Star Wars kits I would put in front of a first-timer, the 1/12 Mandalorian Beskar Armor figure and the 1/144 Millennium Falcon, plus the part-fit and seam-line checks I run on every kit before I decide whether it earned shelf space.
If you want a Bandai Star Wars model kit build that looks deliberate instead of assembled, the order below matters more than the tools.
Why you should trust me
I built my first Gundam kit at 11 and never stopped. That is 15 years of Gunpla, 10 of them with an airbrush in hand, plus a backlog that will outlive me and a day job in IT that pays for it. I have judged local Gunpla competitions twice, which taught me more about honesty than any score sheet.
My rule is simple. No review without a full build, no aftermarket parts, no exceptions. Every kit gets the same treatment: a part-fit scorecard, a seam line check where I look for the joints the engineers tried to hide, and a straight answer about whether the decals behaved. I score engineering, not taste. Every kit is somebody's first kit.
How I picked these two and how I judge any kit
I picked these two because they cover the two shapes a Bandai Star Wars build comes in, a character and a vehicle, and because both are engineered to be finished without cement, putty, or paint if that is what you want.
The part-fit scorecard is where I start. Snap-fit is the standard, not a bonus. A kit that needs glue where the box says no glue loses points before I even look at the detail. Next is gate placement. Gates on a visible surface mean extra sanding and extra risk, and a gate tucked under a part tells you the engineers were thinking about the builder. Third is color separation. If the parts are molded in the right colors, a straight build looks like the subject instead of a grey prototype. Last is decal behavior, because a waterslide that shatters in warm water is a design failure, not a user error.
The Falcon and the figure both clear that bar on paper. The workflow below is how you make sure your build clears it on the bench.
The two kits worth your bench
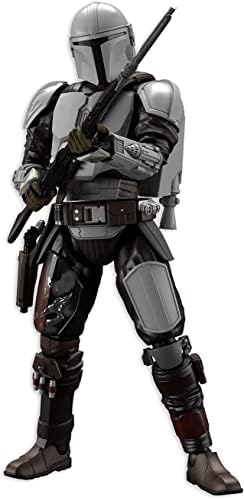
The figure: Bandai Hobby - The Mandalorian - The Mandalorian Beskar Armor, Bandai Spirits Star Wars 1/12 Model Kit
 Visit on Amazon →
Start here if you have never snapped a Bandai kit together. The 1/12 scale figure is the friendliest shape in the line: large parts, a manageable part count, and a body that rewards careful nub cleanup more than it punishes mistakes. The Beskar armor plating is the whole point of the subject, which means the surface is mostly flat panels, and flat panels are where a sanded nub disappears and a chewed one glares.
Build it as a straight build first. Snap it together, look at the seams, then decide about panel lining. The armor lines are already molded in, so a single pass of grey or black ink does most of the work. If you want to paint it, the armor is a forgiving place to learn because you are spraying flat panels instead of a cockpit interior.
Flaws but not dealbreakers: A figure this size shows every sanding scratch you left behind. If you rush the nub cleanup, the flat armor will tell on you.
Anyone who wants a finished kit on the shelf in a weekend, without buying a compressor, should start here.
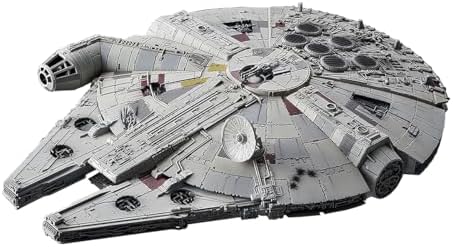
The ship: Bandai Hobby - Star Wars - Millenniuim Falcon (Rise of Skywalker Ver), Bandai Spirits 1/144 Model Kit
 Visit on Amazon →
The 1/144 Falcon is the second build, not the first. Smaller parts, more of them, and a hull covered in greebles that punish sloppy gate cleanup. It is also the more rewarding kit once you have the basics down, because the Falcon is a panel-lining showcase. Every recessed line you trace adds depth that the molded plastic does not have on its own.
The Rise of Skywalker version is the one to get if you want the modern tooling. The older Falcon kits in the line are fine, but the newer the tooling, the better the fit, and the better the fit, the less putty you buy. Build it in subassemblies: hull top, hull bottom, cockpit, turret, then join. Dry-fit the hull halves before you commit to anything.
Flaws but not dealbreakers: The scale is small enough that a heavy-handed sanding pass will erase detail instead of cleaning it. Use a fine grit and let the stick do the work.
Anyone who has built one Bandai kit already and wants a centerpiece for a shelf should take this one on.
The actual build workflow
This works on any Bandai Star Wars kit. The order is the part that matters.
Step one: Read the manual and inventory the runners. Lay the runners out, check them against the first page, and note which ones the manual calls for in each stage. Skipping this step is how you end up hunting for a part with a half-built torso in your hand. Bandai manuals are drawn better than most, so use them.
Step two: Cut, do not twist. Nippers, close to the gate but not flush to the part. Leave a little nub and remove it in a second pass. Twisting a part off the runner tears the plastic and leaves a stress mark that no amount of sanding fully hides.
Step three: Sand the nub in stages. Start with a coarse stick, then medium, then fine, then finish with a polishing cloth or a grey pad. The goal is a surface that matches the surrounding plastic. On the Falcon, avoid the greebles around the gate so you do not flatten them.
Step four: Dry-fit every subassembly. Push parts together without snapping them home all the way, look for gaps, then commit. If a part resists, find out why before you force it. Forcing a snap-fit joint is how you crack a peg and end up reaching for glue, which is exactly the failure this hobby does not need.
Step five: Panel line before final assembly. Ink the recessed lines while the parts are still separate, then let the ink dry and wipe the excess with a light solvent on a swab. The 1/12 figure needs a light touch because the lines are wide. The 1/144 Falcon needs patience because there are so many of them.
Step six: Decals last, and slowly. Waterslides go in warm water, not hot. Let them release on their own instead of pushing them off the paper. If a decal shatters, that is the sheet's fault, but you can still save the build with a decal solution and a steady hand. Place, position, blot, and walk away before you touch it again.
Step seven: Topcoat. A matte clear coat flattens the plastic sheen and makes a straight build look painted. Spray light passes, let each one flash off, and keep the can moving. This is the single biggest visual upgrade per minute of work in the entire workflow.
Step eight: Final assembly and pose. Snap the subassemblies together, set the joints, and put the kit somewhere you can see it. The last step is the one that tells you what you would do differently on the next build.
Where builds go wrong
Most ruined kits fail at step two or step three, not at the painting stage. Nub marks and stress fractures are permanent, and no topcoat hides them.
The second most common failure is impatience with decals. People soak a waterslide for ten seconds, slide it off with a finger, and then wonder why it folded over on itself. Give it thirty seconds and use a wet brush.
The third is panel lining too early or too heavily. Ink that has not cured will smear when you handle the kit, and a dark line in every recess on a 1/144 Falcon turns a detailed model into a drawing. Less is more at small scales.
One more: do not glue a snap-fit Bandai kit because a joint feels loose. If a joint is loose, you probably sanded the peg. A thin layer of clear coat on the peg tightens the fit without cement.
What I did not put on this list
Old tooling from other manufacturers is where beginners get hurt. A kit with raised panel lines, soft detail, and gates sitting on visible surfaces will teach you bad habits and cost you a month of sanding. Revell's old tooling is the classic example: a patience test, not a first kit. The new tooling is a different animal, but you have to know which one is in the box.
Glue-dependent kits are the other trap. If a kit needs cement to hold its shape, it is not a snap-fit build and it does not belong in a first-timer's hands, no matter how good the box art looks.
And grade is not quality. A great high grade beats a mediocre master grade every time, in any line. The two kits above are not the most detailed Star Wars subjects Bandai makes. They are the two that will teach you the workflow without fighting you.
What this all costs
The kits are the cheap part. Check current Amazon price on each one and you will see that a weekend of building costs less than a night out.
The real budget is consumables, and it is smaller than people think. A decent pair of nippers, a set of sanding sticks in three grits, a panel line marker or a bottle of ink with a fine brush, and a can of matte topcoat. That is the whole list. No compressor, no airbrush, no cement, no putty unless you decide you want to paint later.
The other cost is time. A 1/12 figure is a weekend if you take the nub cleanup seriously. A 1/144 Falcon is two or three evenings, most of it panel lining. Spread over the years you will keep the kit on a shelf, that math is easy.
Build the figure first. Learn the nub, learn the ink, learn the topcoat. Then take on the Falcon with the workflow already in your hands, and the ship will look like the box art instead of a promise.